We will use a CALayer because although it's like a UIView on the other side is a lightweight object and it can be animated, rotation will not require much of animation in this sample but will require a bit of mathematics so we will make use of GLKit's GLKMath C functions to make all the calculations, so let's get started.
Basically to rotate a layer we have to perform the following steps:
1. Capture the touch and follow the finger through the screen
for that we create a UIView let's call it RotationView
@interface RotationView ()
{
GLKVector3 lastTouchVector_;
GLKVector3 originVector_;
}
- (GLKVector3) touchPointToVector:(CGPoint) point;
@end
Notice that we implement UIView's touch event methods to detect touches and to follow the finger through the screen
//
// RotationView.m
#import <QuartzCore/QuartzCore.h>
#import <GLKit/GLKMath.h>
#import "RotationView.h"
@implementation RotationView
- (id)initWithFrame:(CGRect)frame
{
self = [super initWithFrame:frame];
if (self)
{
CALayer * innerLayer = [CALayer layer];
innerLayer.frame = CGRectMake(0, (self.frame.size.height - self.frame.size.width) / 2.0f,
self.frame.size.width, self.frame.size.width);
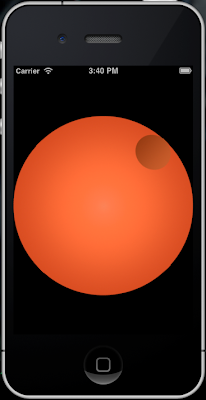
innerLayer.contents = (id)[UIImage imageNamed:@"Image.png"].CGImage;
originVector_ = GLKVector3Make(innerLayer.position.x, innerLayer.position.y, 0.0f);
[self.layer addSublayer:innerLayer];
}
return self;
}
#pragma touch events
- (void) touchesBegan:(NSSet *)touches withEvent:(UIEvent *)event
{
UITouch * touch = [touches anyObject];
CGPoint touchPoint = [touch locationInView:self];
...
}
- (void) touchesMoved:(NSSet *)touches withEvent:(UIEvent *)event
{
UITouch * touch = [touches anyObject];
CGPoint touchPoint = [touch locationInView:self];
...
}
2. Calculate the angle between the current point and the last point
we need to convert the points into tree dimensional vectors (the reason for tree dimensional vectors is explained on point 3.) and translate the UIView origin to the center of innerLayer's so we will use the following code to accomplish that:
- (GLKVector3) touchPointToVector:(CGPoint)point
{
GLKVector3 touchVector = GLKVector3Make(point.x, point.y, 0.0f);
return GLKVector3Normalize(GLKVector3Subtract(touchVector, originVector_));
}
3. Calculate the rotation direction whether it is clockwise or counter clockwise.
The angle will be calculated using the result of subtracting the vectors currentTouchVector from lastTouchVector_ and using the length of the resulting vector as the displacement angle as in the following code:
- (CGFloat) calculateRotationAngle:(CGPoint) point
{
GLKVector3 currentTouchVector = [self touchPointToVector:point];
CGFloat rotationAngle = GLKVector3Length(GLKVector3Subtract(currentTouchVector, lastTouchVector_));
GLKVector3 crossProd = GLKVector3CrossProduct(currentTouchVector, lastTouchVector_);
CGFloat rotationDirection = crossProd.z > 0 ? -1 : 1;
lastTouchVector_ = currentTouchVector;
return rotationAngle * rotationDirection;
}
To keep always a circular path we
normalized the resulting vector (take a look to the last line in point's 2. sample code) so it's length always is 1 ensuring the user's finger moves following the circular path we want.
Additionally notice that to calculate the direction of the rotation whether it is clockwise or counter clockwise we use the
Cross Product of two tree dimensional vectors. This is the main reason to use tree dimensional vectors because a Cross Product only operates on them and to keep the code as homogeneous as possible by always using
GLKVector3.
The Cross product's result is a perpendicular vector to the ones being multiplied and depending on the sign of the Z axis we can determine the rotation direction.
4. Apply
rotation transform using the calculated angle which should consider the rotation direction.
We apply the rotation while the finger moves through the screen and in order to accomplish that we use the following code on UIView's touchesMove method:
- (void) touchesBegan:(NSSet *)touches withEvent:(UIEvent *)event
{
UITouch * touch = [touches anyObject];
CGPoint touchPoint = [touch locationInView:self];
assert([self.layer.sublayers count] == 1);
CALayer * innerLayer = [self.layer.sublayers objectAtIndex:0];
if ([innerLayer hitTest:touchPoint])
{
lastTouchVector_ = [self touchPointToVector:touchPoint];
}
}
- (void) touchesMoved:(NSSet *)touches withEvent:(UIEvent *)event
{
UITouch * touch = [touches anyObject];
CGPoint touchPoint = [touch locationInView:self];
assert([self.layer.sublayers count] == 1);
CALayer * innerLayer = [self.layer.sublayers objectAtIndex:0];
if ([innerLayer hitTest:touchPoint])
{
CATransform3D currentTransform = self.layer.sublayerTransform;
CGFloat rotationAngle = [self calculateRotationAngle:touchPoint];
self.layer.sublayerTransform = CATransform3DRotate(currentTransform, rotationAngle, 0, 0, 1);
}
}
this way is a simple algorithm to accomplish rotation of a CALayer while following the finger on the screen describing a circular path.
You can find the code
here... Enjoy!